Communication
Artemis enables students, tutors, and instructors to actively participate with its communication capabilities. Various communication features allow students to engage with peers and ask all kinds of questions whereas moderators (e.g., instructors and tutors) can provide general course information and answer content-related questions. Communication can be made in different contexts, namely for lectures, exercises, or courses. Course participants can also message each other to communicate in private. Below, you can find more information on specific features and how to use them.
Course-Wide Messages
Artemis automatically creates course-wide channels for course-wide topics, such as Organization or Tech Support, and various elements of a course, namely lectures, exercises, and exams. Messages can be written within these channels on the course messaging overview, which is shown in the screenshot below.

This video provides an overview of the course-wide channel types existing in a course:
Lecture Messages
Messages that are specifically related to a certain lecture.
These messages can also be created on the detail page of the lecture they belong to.
Exemplary lecture detail page with messages:

Exercise Messages
Messages that are specifically related to a certain exercise.
These messages can also be created on the detail page of the exercise they belong to.
Exemplary exercise detail page with messages:

Private Communication
Users of a course can communicate in private via the Messages page. (see image below) The page consists of a collapsible Conversation sidebar on the left, where users can search for other participants of the current course and start a conversation with them. Private communication is only available if the course instructor enables this feature.
If the recipient is browsing another conversation when they receive a new message, an icon with an unread-messages counter is displayed in their conversation sidebar, next to the affiliated conversation that the new message was sent to. This way, users become aware of the new message within that discussion. A reply in a thread raises the counter for the author of the message and for everyone who replied in that thread before, but not for the other members of the conversation. Muting a conversation switches this off.
When you open a conversation that received messages since your last visit, Artemis scrolls to the first of them and marks where they start with a "New" line. If more messages arrived than fit on the first loaded page, the conversation opens where you left it instead, and the "Jump to first unread message" button takes you to the new messages. If there are no unread messages, the conversation opens at the newest message.
The authorities of tutors and instructors are more restricted in the Messages Page compared to the Course Communication Overview. Messages of a conversation are exclusive to its participants and are only editable or deletable by their respective author.
Messages do not consist of titles. Users can continue a discussion around a specific message topic by clicking the messages’ “Reply in thread” button, which opens the Thread sidebar (see image below). The Thread sidebar is a collapsible sidebar located on the right-hand side of the Messages Page when displayed.

This video shows how link previews work in Artemis:
If the message content contains links, a preview of the link will be shown under the message. This way, users will have a good understanding
of what that link is about. If they prefer not to have a preview, they can hover over the preview and click the appearing X button.
The preview will be removed.

Communication Features Availability
For the differences between the Android and iOS apps, see the mobile communication feature comparison. The full mobile feature comparison also covers sign-in, courses, exercises, lectures, Iris, and notifications.
The following sections describe communication in the web application. Available actions depend on the course's communication settings, the conversation type, and your role. The mobile comparison states which of these actions are also supported in each app; it does not make commitments about future releases.
Features for Users
This section captures the most important features that are offered to any Artemis user.
Search, Filter, and Sort Messages
Global Search
In the course communication, users can search for messages across all channels and conversations. The global search can be accessed anytime. To only receive results from a a specific conversation or a specific author, filters can be applied by using the keywords in: or from: or by selecting the respective filters from the dropdown menu. When accessing the global search from a conversation by clicking on the search icon in the top right corner, this conversation is automatically selected as filter.

On the course communication overview, a user can query all existing messages according to the following criteria and their possible combinations:
- Text-based Search using the Global Search
- Contents of Announcement-Message Title
- Contents of Message Context
- Message Characteristics
- Unresolved Messages
- Own (messages current user has authored)
- Reacted (messages current user has reacted or replied to)
- Sorting Configurations (ASC/DESC)
- Creation Date
A simplified version of this feature is available on the exercise and lecture details page as well.
Filter Pinned Messages within a Conversation
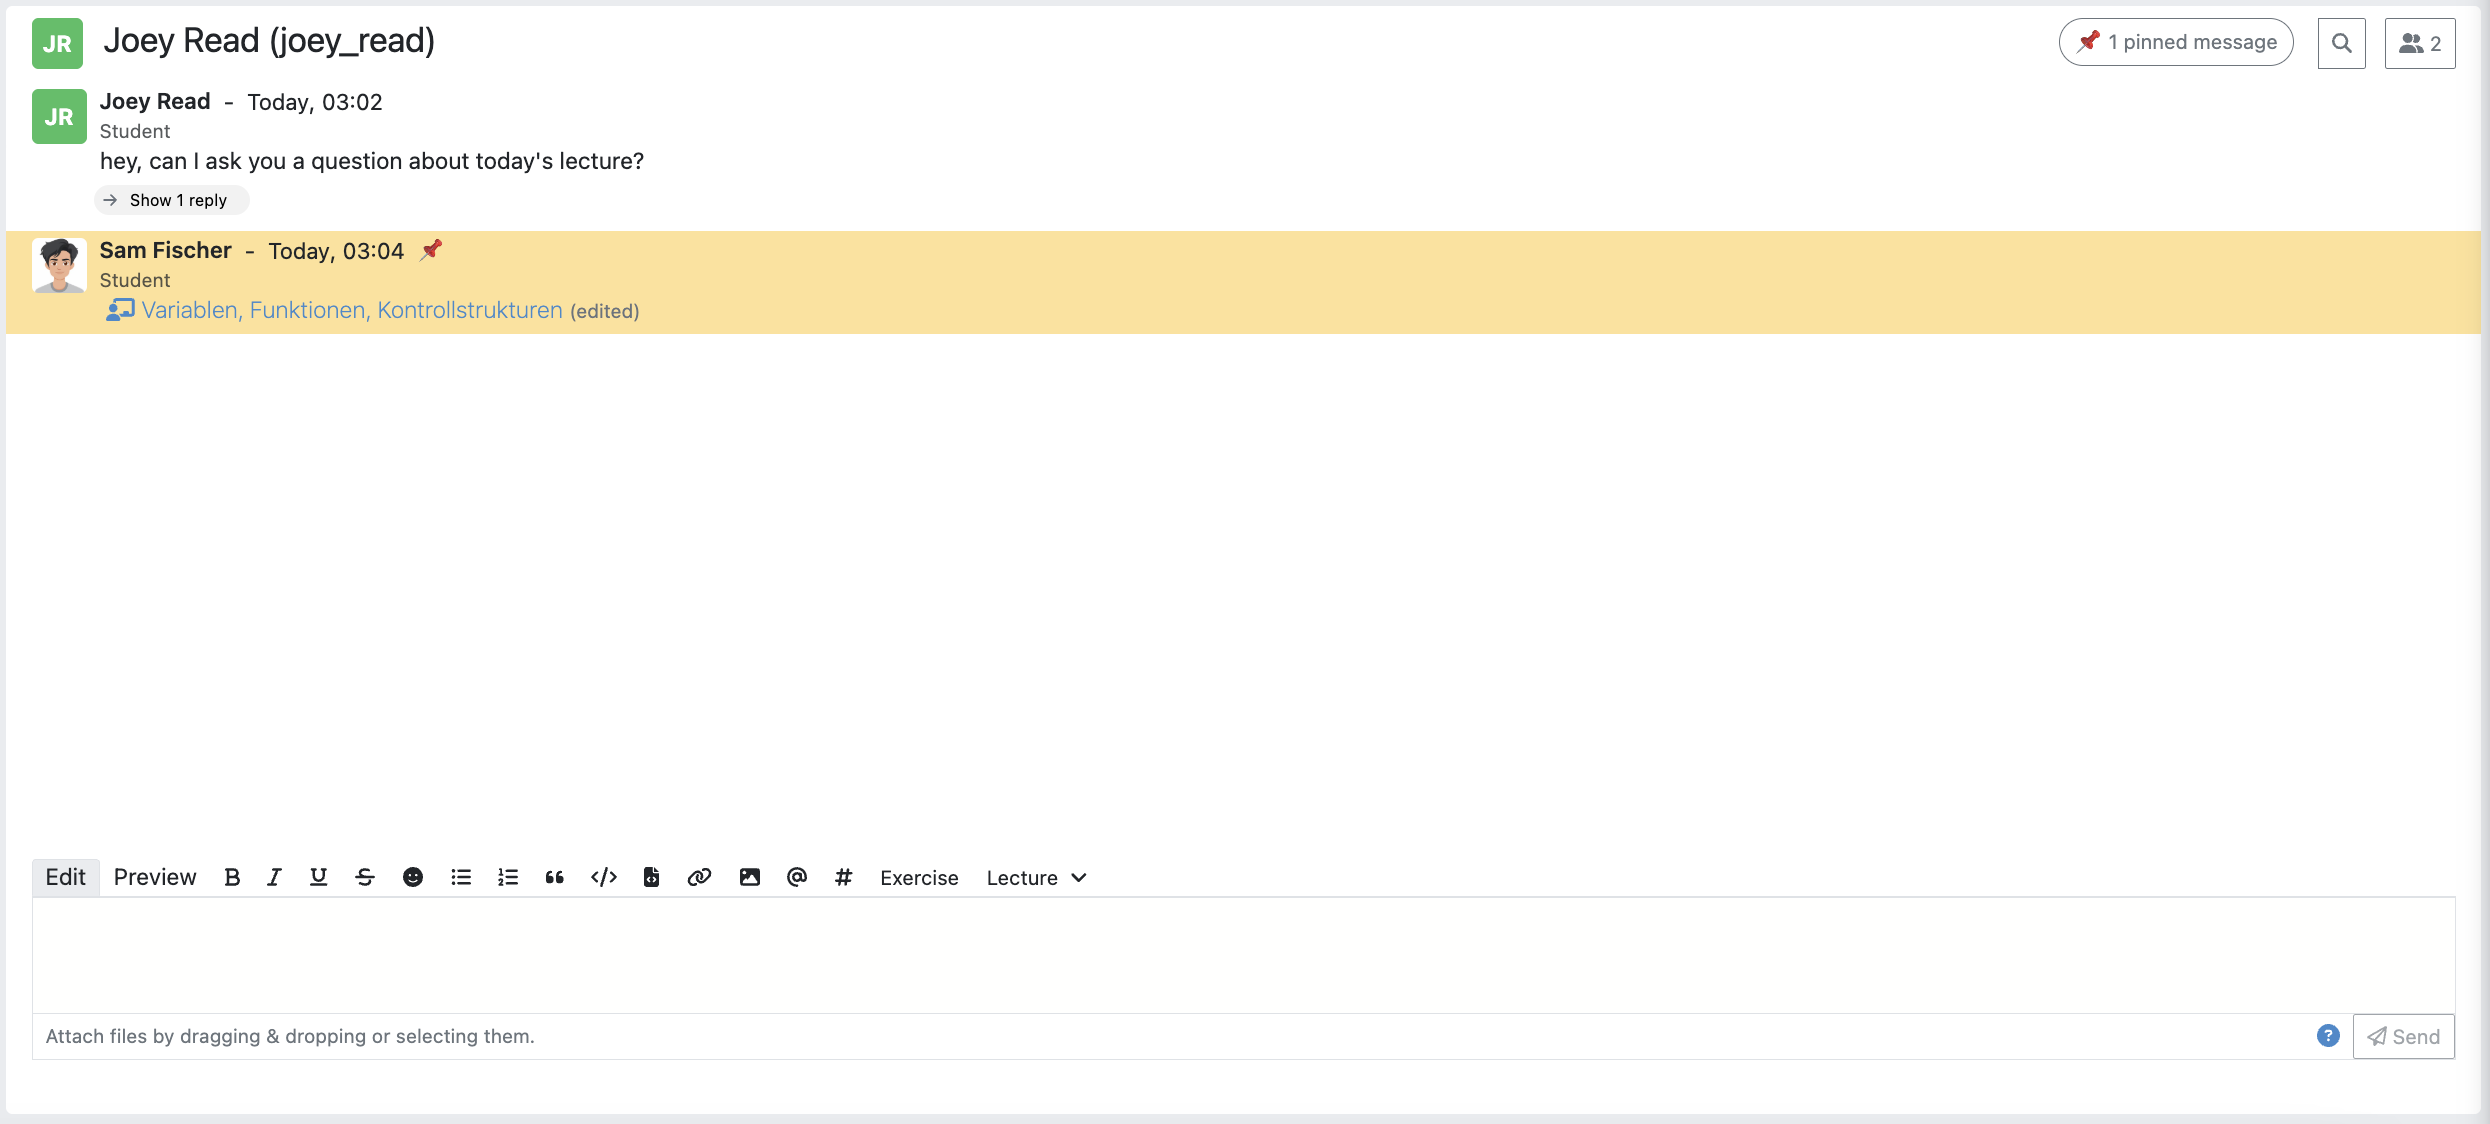
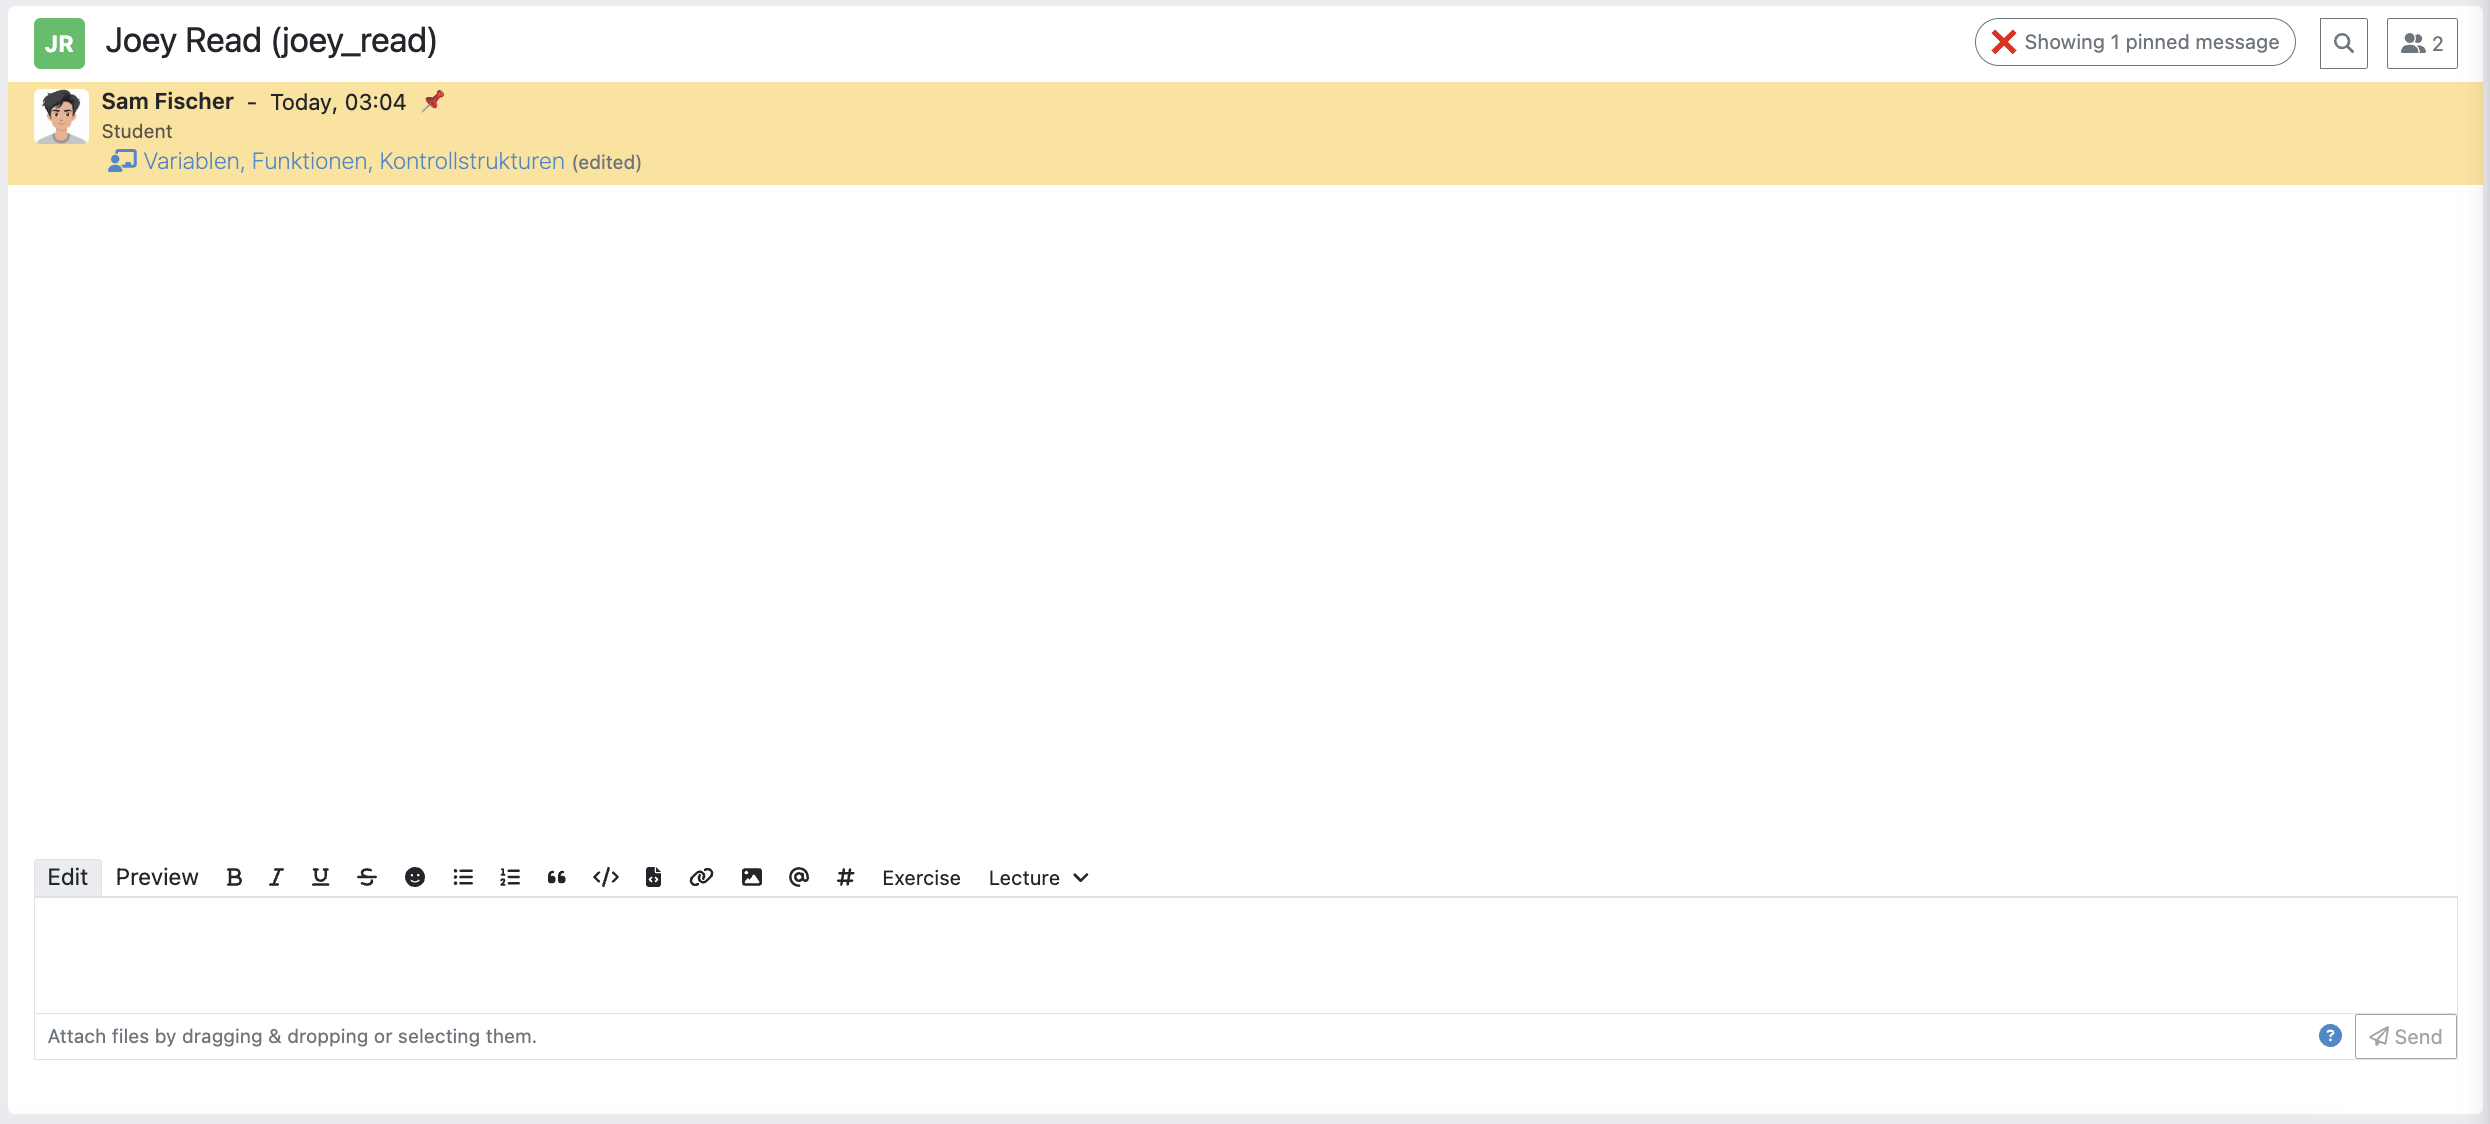
If there are any pinned messages in a conversation, a button labeled "x pinned messages", where x is the number of pinned messages, appears at the top right of the conversation view. By clicking this button, users can filter and view only the pinned messages within that conversation. Clicking the button again returns the view to the regular conversation.
Pinned Messages Button
Applied Pinned Messages Filtering
Verify User Authority
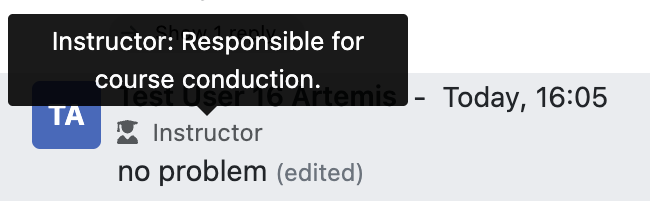
To build trust between users utilizing the system's communication features, we display the user's role below their name in the headers of messages and their replies. When hovering over the displayed role, a tooltip appears showing a brief explanation of that specific role. This way, the system builds trust in the author, and readers can tangibly confirm the origin of the shared information.
Instructor Authority
Tutor Authority

Student Authority

React on Messages
To foster interaction between users, we integrate the well-known emoji reaction bar. Each user in the course can react on any message by making use of the emoji selection button. The ➕ emoji serves as the up-voting reaction, which influences the display order of messages.
Formatted Message Editor
In the web app, messages and replies open with their formatting visible. The toolbar always stays on one line. It shows bold, italic, underline, strikethrough, inline code, links, person mentions, course references, emojis and More options. On a narrow screen, the formatting buttons that do not fit move into the bar that More options opens. Select text or choose More options to show a bar above the editor with lists, quotes, code blocks, attachments, slides and FAQs, and with the formatting buttons that did not fit the toolbar. Fewer options closes the bar again. The bar floats above the editor, so opening it does not move the text you are writing. Controls opened by selecting text close when the selection is cleared. Controls opened with More options stay open until you choose Fewer options. Keyboard shortcuts and pasting or dropping files also work while these options are hidden. An empty editor names where your message goes, for example Message Katja in a direct message or Message general in a channel, and Reply… in a thread. The hint below the editor lists only the essentials on a narrow screen. The help button next to it shows all typing tips on hover or focus.


Type a list marker (-, *, +, 1. or 1)) followed by a space to start a list.
At the beginning or end of a quote or code block, use the up or down arrow key to move to normal text outside it.
Use the toolbar to format selected text or add a link. Bare hostnames such as example.org become HTTPS links; explicit relative destinations stay relative. Select the link toolbar button again to close its popup. Select an existing link to change its text or destination.
Remove link keeps the text and removes its destination.
Keep references such as #123 outside links; link text and destinations containing numeric message references are rejected.
Select text to change its formatting, or choose a format at the cursor to apply it to the text you type next.
Choose the same format again to turn it off. Toolbar buttons show which formats are active at the cursor.

The course material titles shown in these screenshots are from MIT OpenCourseWare: 6.006 Introduction to Algorithms (Fall 2011).
Type @ to search for people, # to search for channels, exercises and lectures in the current course,
or : followed by an emoji name to search for an emoji.
Suggestions open beside the text you are completing. Use the arrow keys to choose a result and Enter to insert it. Enter accepts the result without sending the message;
Escape closes the suggestions. Numeric references such as #123 remain available for linking to messages.
Pressing Backspace immediately after a reference or link selects only that item, including when the cursor follows its automatic separating space. Press Backspace again to delete it. The surrounding text stays unchanged. Use Ctrl+Z or Command+Z to undo edits, formatting and reference insertions. Enter sends a message, including inside lists, quotes and code blocks. Ctrl+Enter or Command+Enter also sends, even when suggestions are open. Shift+Enter inserts a line break without sending. In a list, it starts the next item; on an empty item, it returns to normal text. Use the arrow keys at a quote or code block boundary to return to normal text. Press Backspace on an empty list item to return to normal text on the same line.
The toolbar also lets you attach images or PDFs, search lecture attachments and individual slides, reference a published FAQ, or search for an emoji. Images have a thumbnail in the editor, and PDFs appear as links. You can also paste or drop files into the message. Pasting retains supported text formatting, links, lists, quotes and code. Source fonts and colours are replaced by the editor’s styling; tables fall back to plain text. Pasting into code keeps the clipboard text literal. Use your browser’s paste-as-plain-text command to discard formatting. Copying or cutting references and attachments within Artemis keeps their targets when you paste into another message editor. Cut and paste remain undoable. Content copied from other applications still passes through the supported-format checks. Uploads use the conversation file types and size limits. Wait for an upload to finish before sending or saving. Resource pickers insert at the cursor position you selected before opening them. Slide numbers stay visible beside the title. Hover over a slide or select it with the arrow keys to preview it before inserting. The compact emoji picker closes when you click outside it or press Escape.
Communication supports the messaging formats shown in the toolbar. Tables, mathematical formulas and arbitrary HTML belong in exercise problem statements. Existing messages with unsupported formatting cannot be edited here; their saved content remains unchanged. For an unsent draft with unsupported formatting, select Discard draft to start a new message. The formatted editor is an exploration for the web app; the iOS app continues to use its existing editor.
Reference Course Entities
Users can reference to different course entities within their messages, such as other messages, course exercises, course lectures, and the content of these lectures. All references are then prepended with icons which are unique to the reference's type, to help users distinguish them conveniently. In the image below, we see all possible types of references that can be created in an Artemis message.

Reference Course Exercises
Users can refer to exercises of the current course, via the dropdown menu Exercise available on the posting markdown
editor (see image above). The following types of exercises are prepended unique icons to help distinguish the type of the
exercise being referenced.
- Text Exercise
- Quiz Exercise
- Modeling Exercise
- File Upload Exercise
- Programming Exercise
Reference Course Lectures
Users can refer to lectures of the current course, via the dropdown menu Lecture available on the posting markdown
editor (see image above).
Reference Lecture Attachment Units
Users can refer to lecture attachment units of the current course, via the dropdown menu Lecture available on the posting markdown
editor, see image below. Here, lecture attachment units can be found when users hover over the specific lecture.
Reference Lecture Unit Slides
This video describes how lecture slides can be referenced:
Users can refer to lecture unit slides of the current course, via the dropdown menu Lecture. Here, slides can be found when users
hover over a specific unit, see image below.

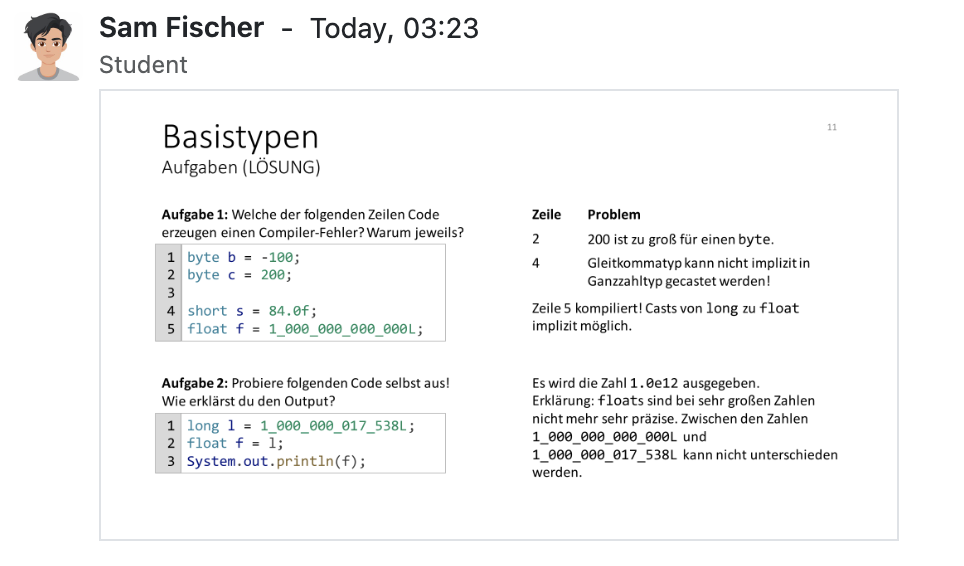
After the user references a single slide they can see it as an image included in the message. Additionally, they can preview the slide in order to easily read the content by clicking the image.

Reference other course members
Users can mention other course members within a message, by either typing an @ character or clicking the @ button available on the posting markdown editor. By typing in the name of a user to mention, the author of the message can search for a certain user they want to mention as demonstrated in the video below.
Notify all members of a group chat
In a group chat, the suggestion list starts with @all. Any member of the group chat can use it to notify every other member at once, for example to announce a meeting time. The members receive the same notification as for a personal mention.
@allonly works in group chats. In channels and direct messages it stays plain text and does not trigger a mention notification. The message itself still sends the regular notification, like any other message.- Members who muted or hid the group chat are not notified, and neither is the author.
@allonly counts where it is displayed as normal text. Inside a quote, inline code, a code block (also as HTMLcode,preorblockquote), an HTML comment, the address of a link or a URL (also one that starts withwww.ormailto:) it does not count, so quoting a message that contains@alldoes not notify the group again. Text in other HTML, for example in a paragraph, counts, and so does@allthat stands next to a URL, as insee www.example.org @all.- It works for messages and for replies in a thread. Editing a message does not send any notifications.
- A member who is mentioned by name and through
@allin the same message receives one notification.
Reference channels
Similar to course members, users can reference public and course-wide channels of a course by either typing an # character or clicking the # button available on the posting markdown editor.
Mark Your Message As Resolved
Marking a message as resolved will indicate to other users that the posted question is resolved and does not need any further input. This can be done by clicking the check mark next to the answer message. (see image below) Note that only the author of the message as well as tutors and instructors can perform this action. This is helpful for moderators to identify open questions, e.g., by applying the according filter in the course overview. It also highlights the correct answer for other students that have a similar problem and search for a suitable solution.

Forward Messages
Users can forward any message to another conversation within the same course. In the forward message dialog, they can add additional content using the input field. At the top of the dialog, users can search for channels or users by typing into the input bar and selecting from the auto-suggestions. They can select multiple conversations at once to forward the message to several destinations simultaneously. Recipients can read the forwarded message even if they cannot access the original conversation. They can also forward the received message onward within the same course. Forwarding shares that message, including its author, but does not share the rest of the original conversation or its replies. Users who also have access to the original conversation can navigate to the original message by clicking the View Conversation button.
Forward Message Dialog

Forwarded Message View

Save Messages
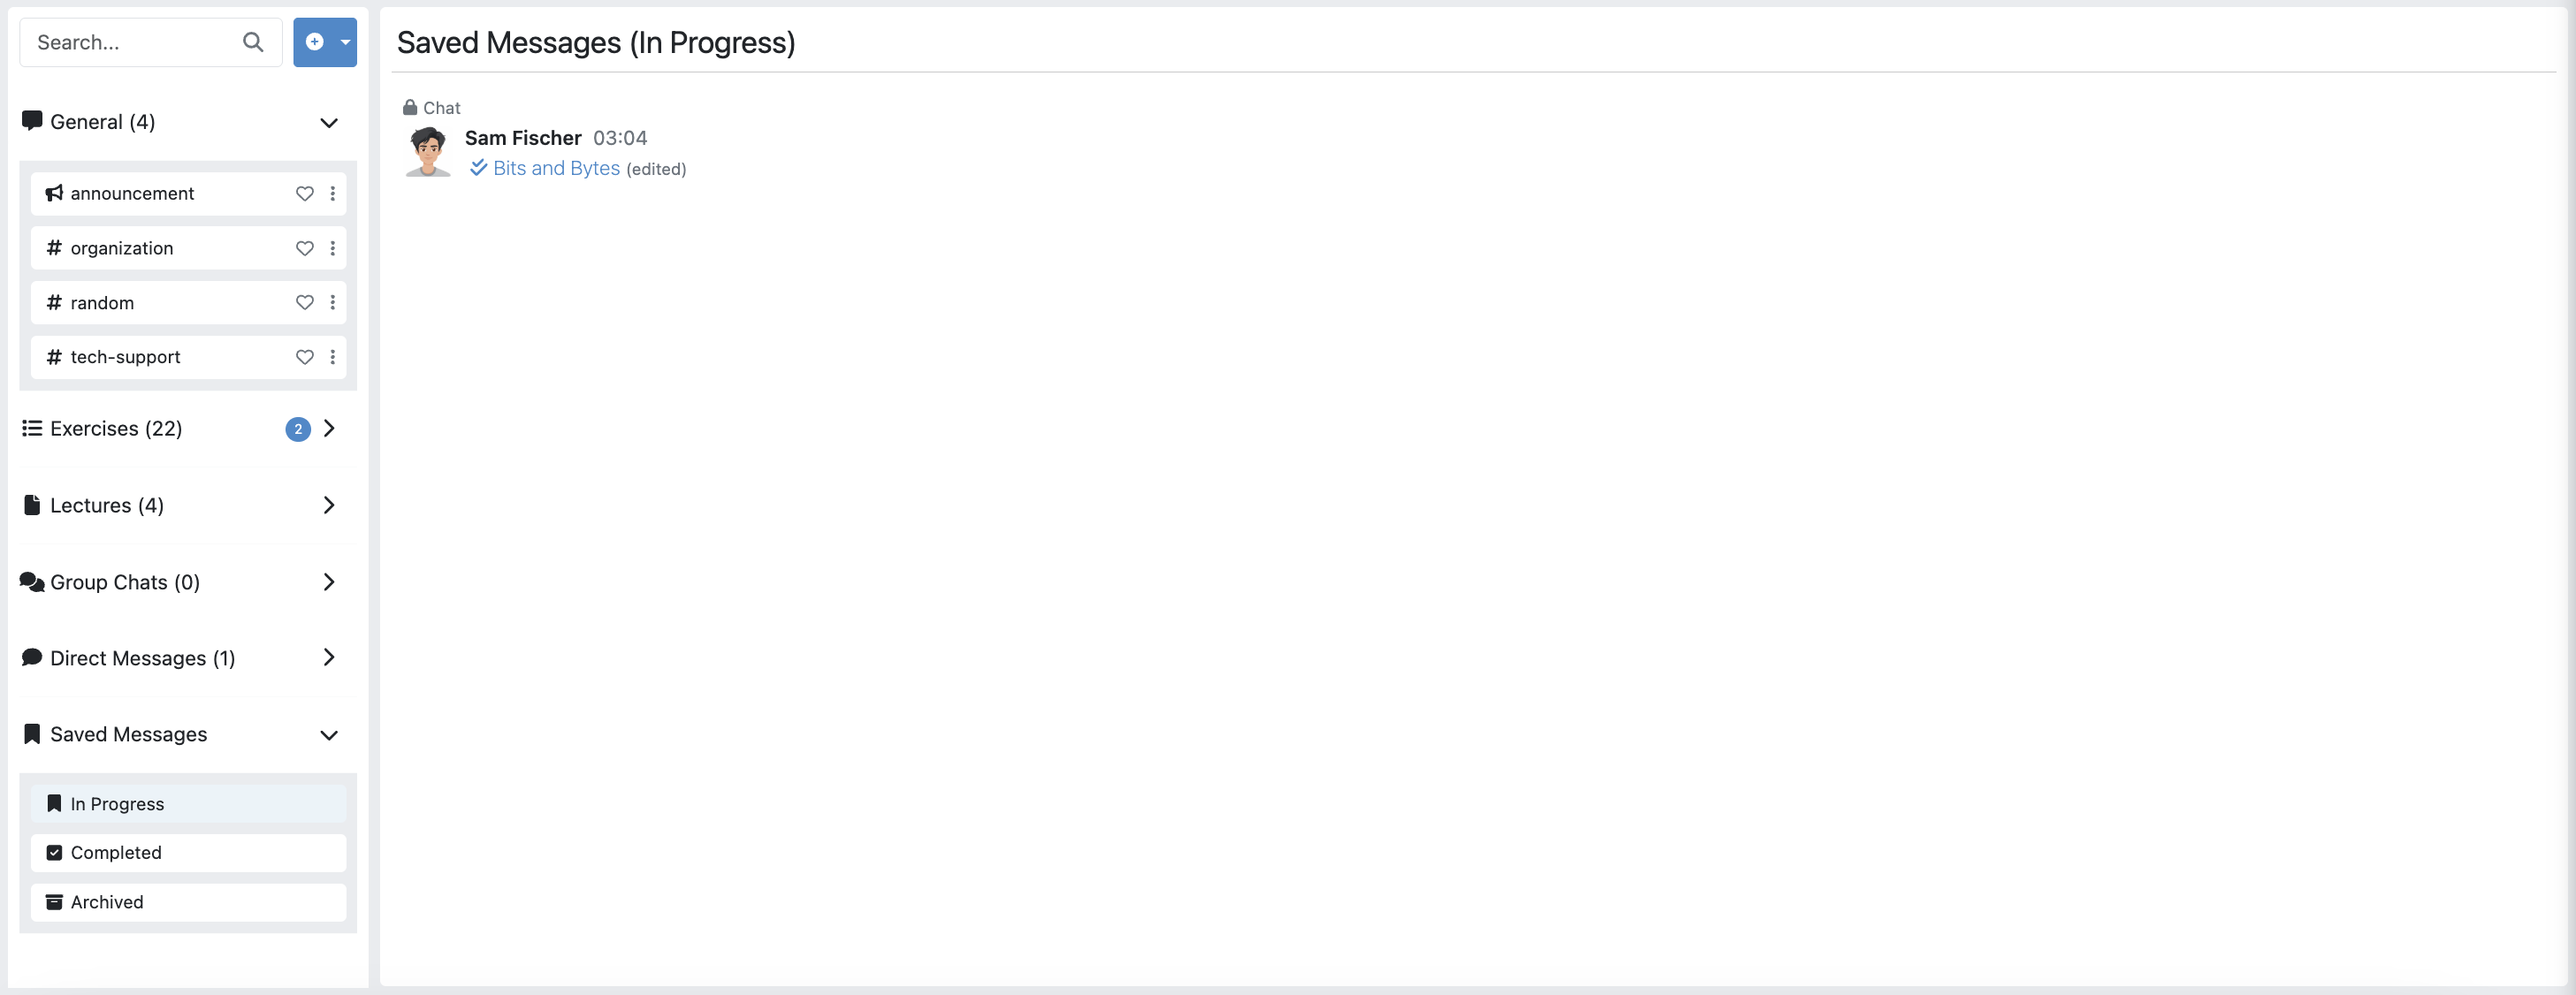
Users can save messages and access them later from the Saved Messages section in the sidebar. Saved messages are organized into three categories: In Progress, Completed, and Archived. Messages initially appear in the In Progress section and can be marked as done to move them to Completed, or archived to move them to the Archived section. Clicking on a saved message navigates the user directly to its exact location within the conversation.
Expand Thread to Full-Screen
Users can expand a thread to cover the entire conversation view by clicking the expand button located at the top right corner of the answer thread. Clicking the same button again returns the thread to its original size.

Profile Pictures
Users can upload a profile picture in their account settings to enhance personal recognition. Once set, the profile picture will appear alongside any messages they post. The following video provides a step-by-step guide on how to upload a profile picture:
Draft Messages
When composing a message or replying in a thread on the WebApp, Artemis automatically saves your input as a draft. This ensures that unfinished messages are not lost when navigating between conversations or accidentally closing the tab.
Draft messages are:
- Stored locally (not synced across devices)
- Associated with the user and the corresponding conversation or thread
- Automatically restored when reopening the same context
- Removed once the message is sent
- Automatically deleted after 7 days if not submitted